

728x90
40일차
30개 프로젝트로 배우는 Android 앱 개발 with Kotlin 초격차 패키지 Online
강의 목표
- 프로젝트를 따라해보며 앱개발에 필요한 기술을 학습할 수 있습니다.
- 프로젝트를 따라해보며 앱개발에 필요한 기술을 학습할 수 있습니다.
- 앱 개발시 원하는 기능을 구현하기 위해 어떤 기술이 필요한 지 알 수 있습니다.
- 디자인 아키텍처 패턴, 비동기 처리 등 효율적인 앱 개발 방법을 익힐 수 있습니다.
목차 02 Basic - Ch07. 녹음기
- 기본 UI 구성
- 권한 요청하기
- 녹음 기능 구현하기 - 1
- 녹음 기능 구현하기 - 2
- 오디오 시각화
- 마무리
기본 UI 구성
녹음기 어플에 필요한 기능은 무엇인가? 소리를 녹음하여 저장하고 들을 수 있는것.
그렇다면 녹음기를 다루기 위한 버튼은 다음 4가지 상태를 가질 수 있다.
- 녹음 전
- 녹음 중
- 녹음 끝
- 녹음 파일 재생 중
이러한 버튼은 상태에 따로 심볼이 달라질 것임으로 레이아웃을 정의할 때 imagebutton 대신 코틀린 클래스를 만들어서 관리 해보도록 하자.
먼저 상태를 정의하기 위해 enum class를 정의하도록 한다.
enum class State {
    BEFORE_RECORDING,
    ON_RECORDING,
    AFTER_RECORDING,
    ON_PLAYING
}
그리고 이 enum 상태 클래스를 가지고 분기 처리하여 이미지를 바꾸는 버튼 클래스를 정의할 수 있다. AppCompatImageButton을 활용해보도록 하자
class RecordButton(
    context: Context,
    attrs: AttributeSet
): AppCompatImageButton(context, attrs) {

    fun updateIconWithState(state: State) {
        when(state) {
            State.BEFORE_RECORDING -> { setImageResource(R.drawable.ic_record) }
            State.AFTER_RECORDING ->  { setImageResource(R.drawable.ic_play) }
            State.ON_PLAYING,
            State.ON_RECORDING -> { setImageResource(R.drawable.ic_stop) }
        }
    }
}
코틀린 클래스로 커스텀 클래스로써 xml에서 수정 가능토록 하기 위해서는 Context와 AttributeSet이 인자로 전달 받아야 한다고 한다
Android API : custom-view / create view 참고
이제 View 를 구성하자
<Button
android:id="@+id/resetButton"
android:layout_width="wrap_content"
android:layout_height="wrap_content"
android:text="RESET"
app:layout_constraintBottom_toBottomOf="@id/recordButton"
app:layout_constraintLeft_toLeftOf="parent"
app:layout_constraintRight_toLeftOf="@id/recordButton"
app:layout_constraintTop_toTopOf="@id/recordButton"
tools:ignore="HardcodedText" />
<TextView
android:id="@+id/recordTimeTextView"
android:layout_width="wrap_content"
android:layout_height="wrap_content"
android:layout_marginBottom="20dp"
android:text="00:00"
android:textSize="30sp"
app:layout_constraintBottom_toTopOf="@id/recordButton"
app:layout_constraintLeft_toLeftOf="@id/recordButton"
app:layout_constraintRight_toRightOf="@id/recordButton"
tools:ignore="HardcodedText" />
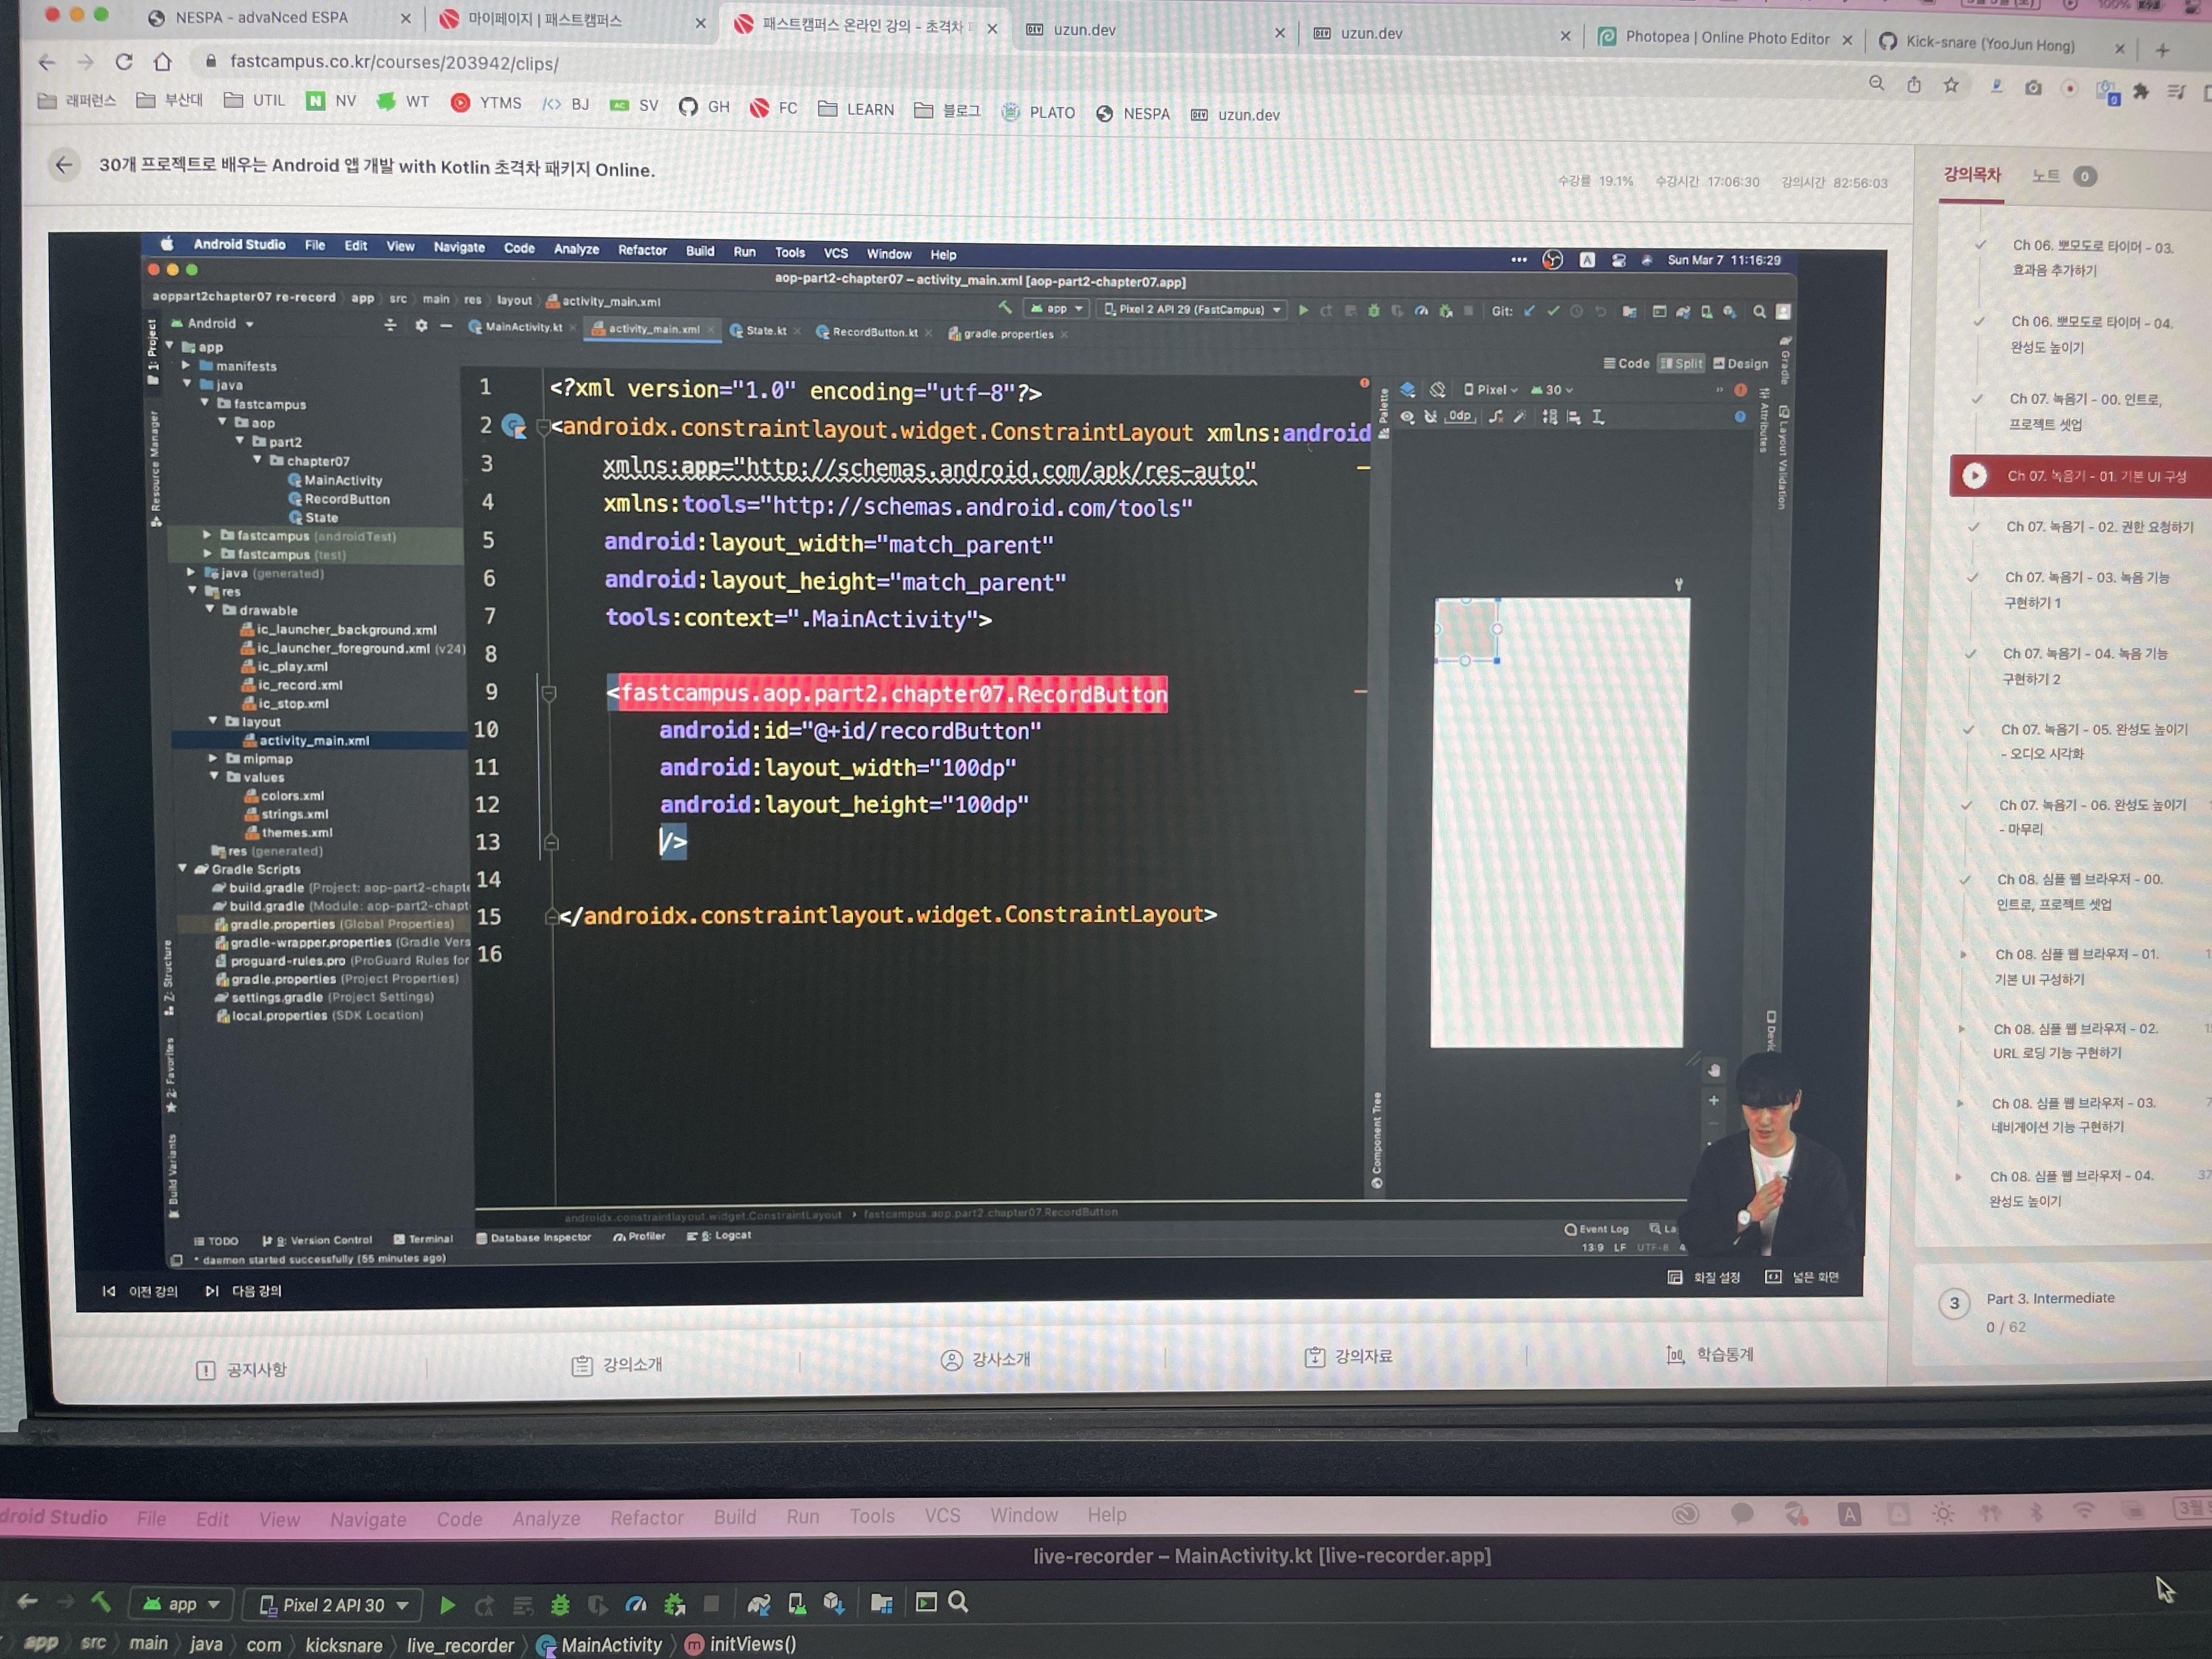
<com.kicksnare.live_recorder.RecordButton
android:id="@+id/recordButton"
android:layout_width="100dp"
android:layout_height="100dp"
android:layout_marginBottom="50dp"
app:layout_constraintBottom_toBottomOf="parent"
app:layout_constraintLeft_toLeftOf="parent"
app:layout_constraintRight_toRightOf="parent" />
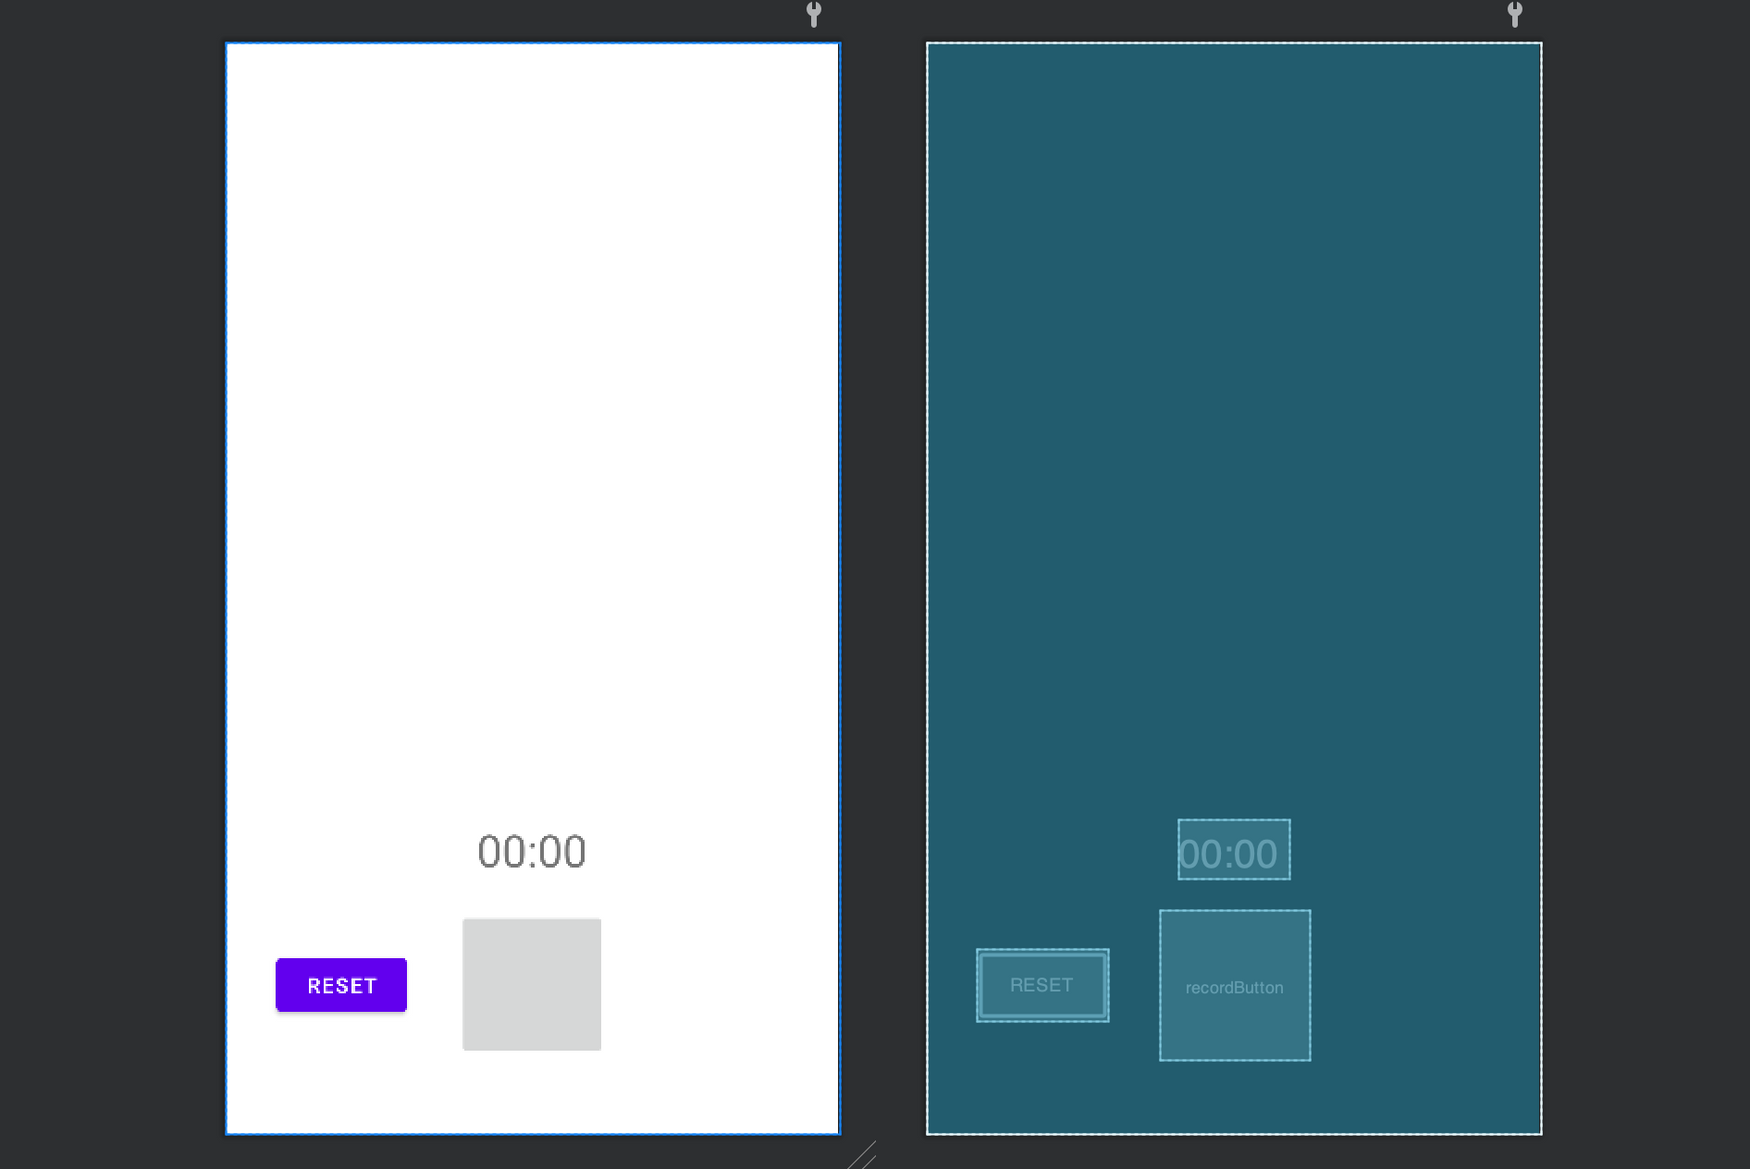
위 코드와 같이 custom 뷰를 정의하여 사용할 수 있다.
그럼 대충 메인 액티비티를 짜보자
private val recordButton: RecordButton by lazy {
    findViewById(R.id.recordButton)
}

private var state = State.BEFORE_RECORDING

override fun onCreate(savedInstanceState: Bundle?) {
    super.onCreate(savedInstanceState)
    setContentView(R.layout.activity_main)

    initViews()
}

private fun initViews() {
    recordButton.updateIconWithState(state)
}
인스턴스를 생성하고 init 하면서 만든 함수로 상태를 넘겨줘서 update 해주자
본 포스팅은 패스트캠퍼스 환급 챌린지 참여를 위해 작성되었습니다.
수강인증샷

링크
728x90
'Android > Challenge' 카테고리의 다른 글
| 패스트캠퍼스 챌린지 42일차 (0) | 2022.03.06 |
|---|---|
| 패스트캠퍼스 챌린지 41일차 (0) | 2022.03.05 |
| 패스트캠퍼스 챌린지 39일차 (0) | 2022.03.03 |
| 패스트캠퍼스 챌린지 38일차 (0) | 2022.03.02 |
| 패스트캠퍼스 챌린지 37일차 (0) | 2022.03.01 |